Websites | 2. Editing Your Website
QUICK NOTE:
Under this section, we cannot edit the following sections:
- Header of the webpage

- Footer of the webpage
To edit your current webpage, there are a few basic steps to follow:
- Login your Portal.
- Go to the webpage that you want to edit.
- Click on Enable Visual Builder present on the top bar.

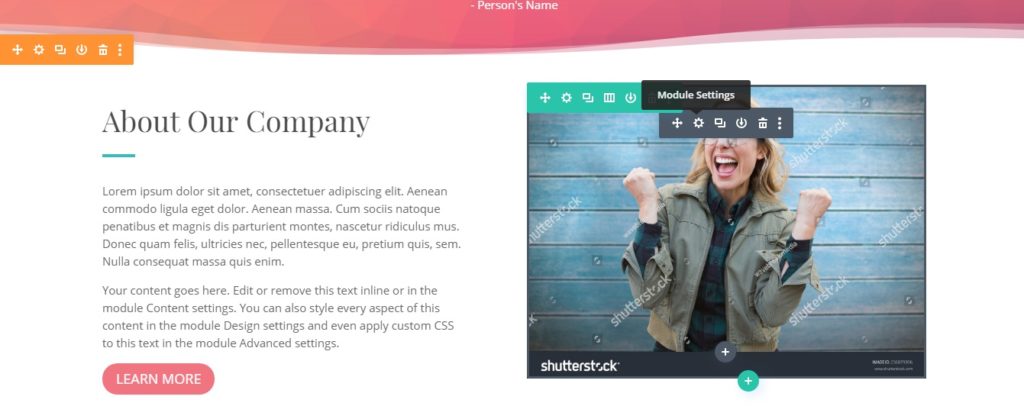
ADDING/MOVING/DELETING A NEW MODULE/ROW/SECTION
You can add as many modules/rows/sections in your webpage. Generally, we advise you to add only new modules at first as they are easier to add and customize as well.
You can follow these steps to add the new module:
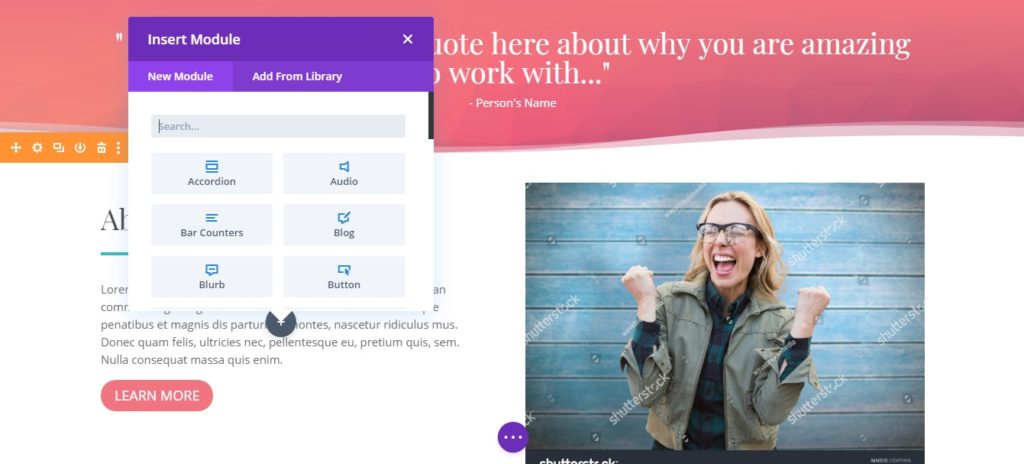
- Place your mouse cursor to the section where you want to add the new module. While placing your cursor, you will notice the + sign near that section.
- Click on the + sign to add the new module. A popup window will open up immediately. You can select the type of your module from the list. It can be an image module, text module, video module, button module and so on.
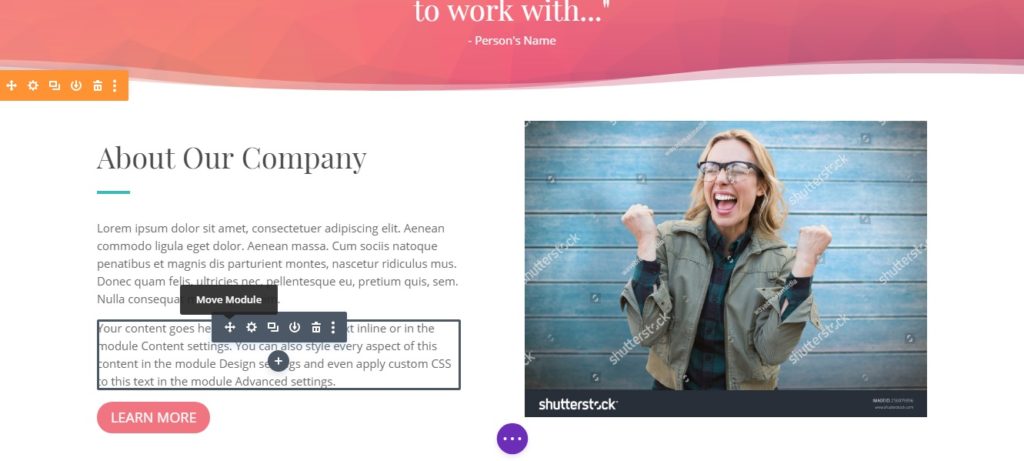
- After selecting your type of module, your new module will be added to your webpage. You can also move your module to some other section of the webpage by using the Move Module tab.
- Similarly, you can re-size your module by compressing/expanding it from its edges (in a similar way, we use to re-size the image in MS-Word).
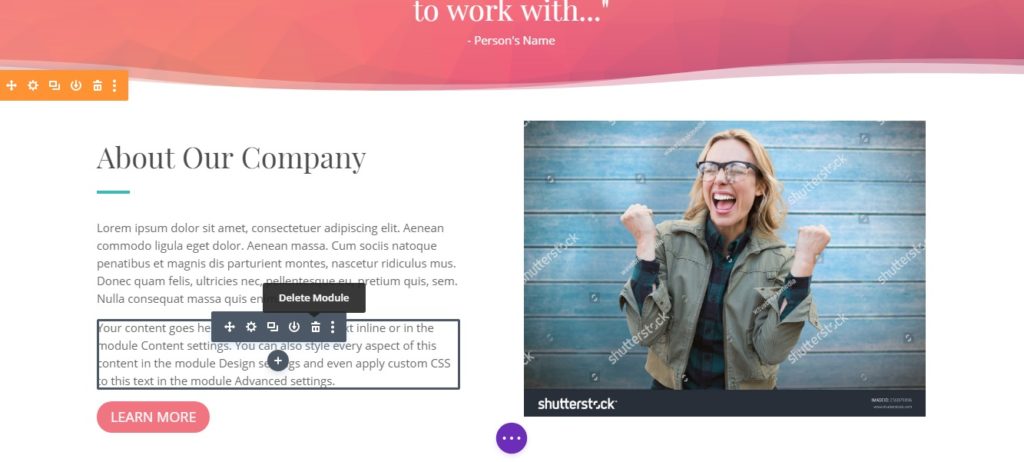
- To delete a particular module, you can place the mouse cursor on the desired module and can then click on the Delete Module tab.
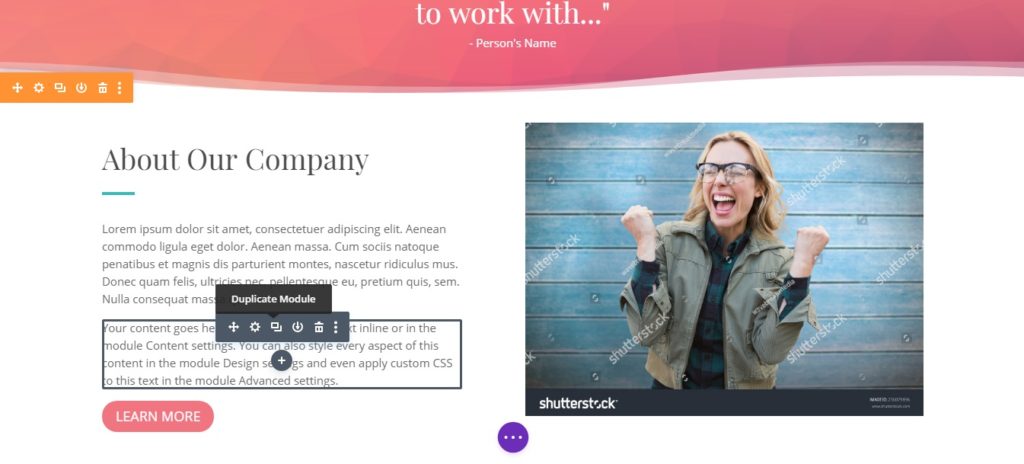
- Similarly, you can make an identical copy of your existing module by using the Duplicate Module tab.
CUSTOMIZING YOUR MODULE
As we have mentioned earlier, there are different types of modules ranging from Image, Video, Button, Text, Comments, Maps etc. In this section, we will talk about some of the general modules that you will use commonly.
Text Module
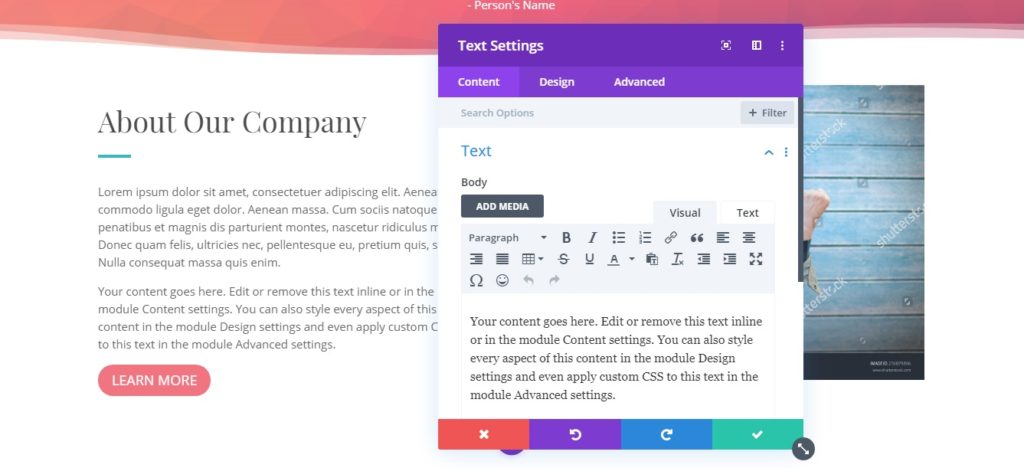
- To edit/customize the text module, first, you have to place your mouse cursor on the desired text module and click on the Module Settings tab.

- Inside Module Settings, you will see the Content tab under which you can edit/update your content in a similar fashion we use to do in MS-Word.
- In the next tab: Design Tab, you will see different sections where you can play with the colors, spacing, font style, alignment etc.
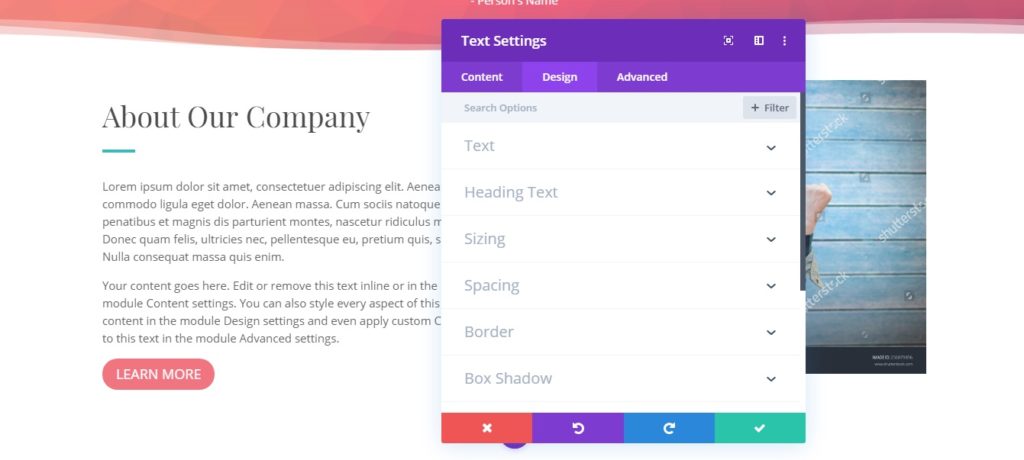
Image Module
- To edit/customize the image module, first, you have to place your mouse cursor on the desired text module and click on the Module Settings tab.
- Inside Module Settings, you can see different options like Settings(to change the Image), remove/delete the image etc.
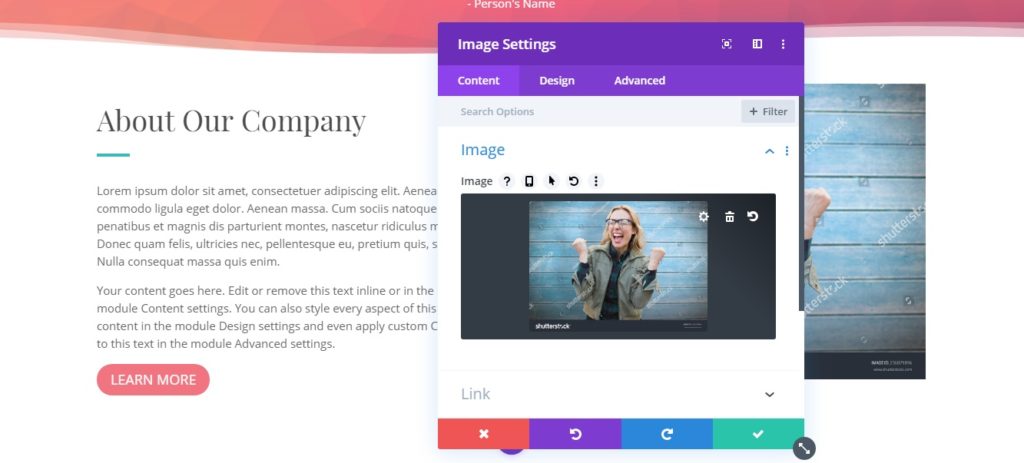
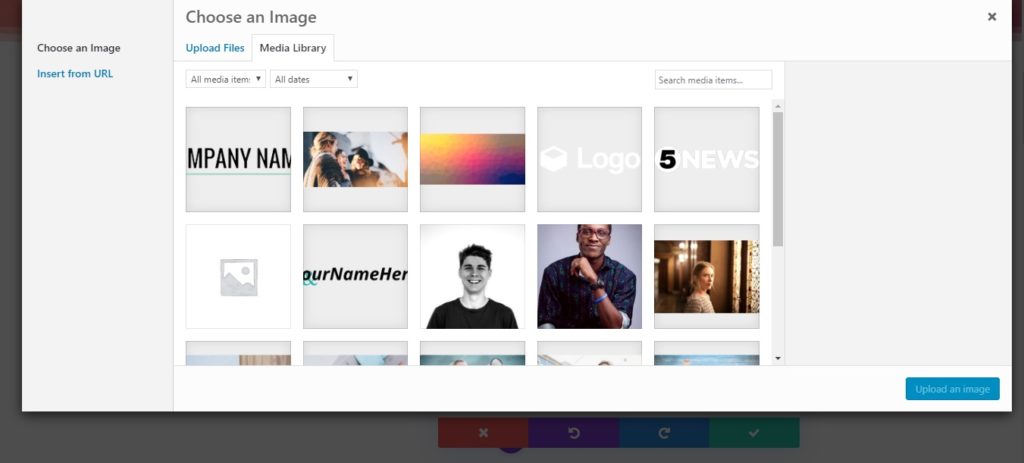
- You can also upload the image from the library or your computer by clicking on the settings tab.
Video Module
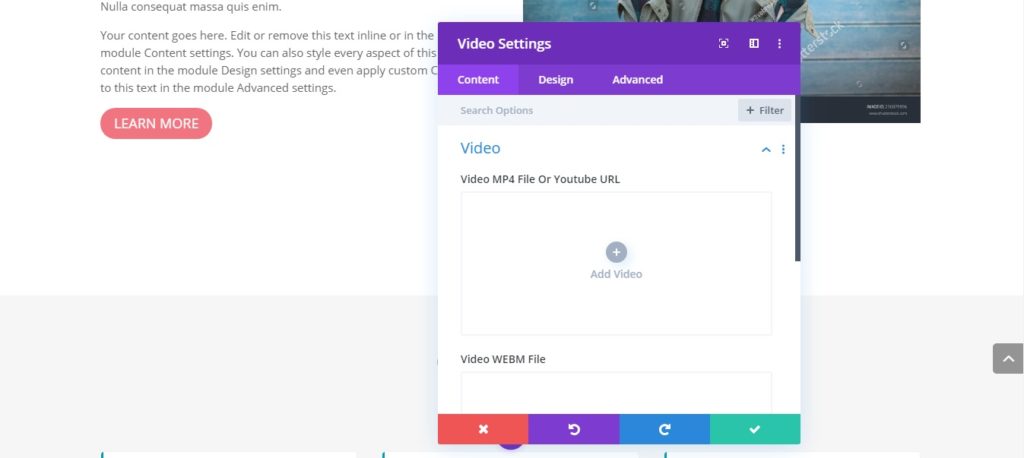
- To edit/customize the video module, first, you have to place your mouse cursor on the desired text module and click on the Module Settings tab.
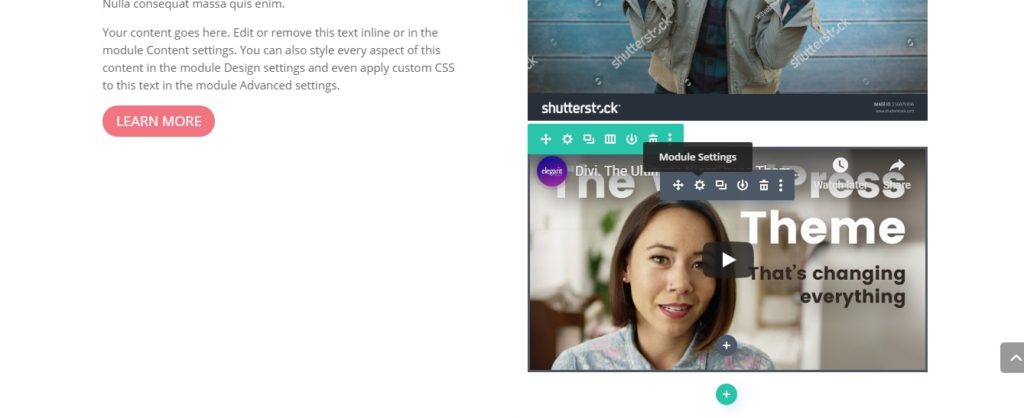
- Inside Module Settings, you will be given three formats to upload your video: MP4 Video, YouTube URL and Video WEBM File. You can upload MP4 Video and Video WEBM File in the same way we upload an image from the library or computer.
SAVING THE FINAL CHANGES
After making all the changes, don’t forget to save the changes by clicking on 3 circular dots present at the bottom of the screen and then hit the Save button.


If you’re still a bit confused, you can always contact us at support@smadigital.co.uk and we’ll be happy to help!